Hand crank Radio

We wondered ourselves and research how to improve interactions in remote areas where the electricity it's not granted. There are a bunch of opportunities if we think about education, information, entertainment, sports, cooking, business models, health without electricity. This happens because if we disconnect systems from the grid we realize that everything has to operate differently and efficiently, being that this time the energy is a variable and not a constant.

We spent so much time brainstorming about so many opportunities. Finally, we decided to choose an aspect which has improve quality life since It appeared: Telecommunications. What about if we are able to communicate people through long distances, being out of the grid A.K.A: using solar or kinetic energy. 

Radio is a technology discovered in 1820 and really well documented in order to make functional prototypes. With this in mind, we build an FM transmitter in order to test the capabilities of this accessible radio sender.

This radio transmitter is based on this tutorial:
http://www.instructables.com/id/The-Ultimate-FM-Transmitter/
We changed some parts in order to make it functional with the parts we had access to and to understand it better. So instead of using a trimmer capacitor we used an arrange of fixed capacitors connected in series and parallel to get about 30pF.

The first problem we faced was that the radio frequency was out from the radio receiver range, which means we weren't able to listen to our transmitter with a regular radio (88.1MHz - 108.1MHz) which was our first test. So we had to find our signal with a bigger receiver and wiggle our prototype to reach the final 88.9MHz. Once there, we are able to hear people at almost 300 meters. Although, this system is pretty unstable and it demands shielding and a bigger ground in order to make it work in the same frequency all the time. Any capacitance nearby was changing the frequency in at least 0.1Mhz, make it impossible a proper debugging.

Besides of that, we weren't communicating people properly. An FM Transmitter just sends data but it doesn't receive it, this is a one-way communication device. The easy part of these kinds of devices is the transmitter, the receiver is so much complex to built and too difficult to calibrate. On the other hand, this little was consuming 9V and 0.16 A. We decided to not "recreate the wheel" and go with some circuit that fits our purpose. WalkieTalkies would be!.

The walkie talkies are radio transmitters and receivers in UHF 462-467 MHz and consume 3 x AA each connected in series = 4.5 V. Taking them apart and testing with a power supply we got the minimum power level we need in order to make it work

MIN POWER IN SLEEP MODE: 3.4 V - 0.06 A
MIN POWER RECEIVING RADIO: 3.4 V - 0.14 A
MIN POWER TRANSMITTING DATA: 3.4 V - 0.36 A

Taking in the count this data we realized the decision of buying existing walk-talkies was right. The power consumption is less than our initial prototype and the capabilities are so much bigger.

We removed the screen and the headphones to measure the power consumption and notice a significant difference. There is no one or too insignificant. We decided to keep this extra pieces, being that they are not expensive energitacally speaking.

Energy in Colombia

This presentation presents the basic knowledge about energy generation in Colombia and its main variables:

https://docs.google.com/presentation/d/e/2PACX-1vQCGOXWNz9qJfQKddjp9AfwQCkFViPW3LNcEmvSnZFJ1peCnL0_r71IMUk1mckkh1eQT58v0hgaVGNM/pub?start=false&loop=false&delayms=3000


ENERGY IN COLOMBIA [CLICK HERE] 


Computing Powered by Solar

In this project, we decided to create an HTTP Server and Client been run by an MKR1000. A solar Server!. In order to accomplish this, we have to measure the power consumption of the microcontroller.Just as an experimentation upload the Blink Sketch available in the Arduino examples to test how much power is drawn by an Arduino without a wifi connection. The result of this measure is amazing, showing us 5 volts at 20mA, which is less consumption than a regular DC motor running properly. The effectiveness that these commercial microcontrollers amazed my eyes.

29387057_10105914415361282_66160028414902272_o.jpg

Once we upload and sketch connecting to WIFI the consumption will vary between 110 - 130mA  without significant changes.

WhatsApp Image 2018-03-26 at 4.32.04 PM.jpeg

Now, we know what is the solar panel we will need. Our choice was a 6V, 2W solar panel which means 0.33 A, if we think Watts = Amps * Volts. According to the documentation MKR1000 has a power regulator up to 6V built in the Vin pin so we are able to connect directly to Vin and GND without a power regulator.


The solar panel exposed to indirect sun light is able to boot the Arduino, but the power supply is so variable, booting the micro controller multiple times really quickly without any connection to internet. Connecting the same solar panel to a DC motor, the amperage read by the multi-meter in series is 8 mA but it is not even moving which logically is less than the needed min 10 mA to power the MKR1000. Our set up is just powered up by direct sun light getting 4.5 Volts and  120mA. We designed a simple box to glue on the glass, this location receives sun light around 11.00am.

WhatsApp Image 2018-03-26 at 4.30.53 PM.jpeg
29386431_10105914415351302_7273760053327298560_o.jpg

We decided to monitor the values and running time of our little box using internet of things IoT (cayenne at https://cayenne.mydevices.com) meanwhile it is running a simple HTTP Server and Client sketch. Next day the results are that the micro controller runs the server from 11am to 12.30pm  intermittently.

Graphing the data we got:


millis.JPG

The behavior is consistent on the same range of hours (from 11 to 1 pm). The only days the server was running for more that one hour were Thursday and Sunday., which means less clouds generating shadows.

SMB ATmega32u4

IDEAL INTERACTION:

This is the ideal final product I intend to develop. A USB fake pen drive. Once you connect this device to your computer it will open a blog note and write "You are being observed, turn around slowly".The project invite people to question: How vulne…

This is the ideal final product I intend to develop. A USB fake pen drive. Once you connect this device to your computer it will open a blog note and write "You are being observed, turn around slowly".

The project invite people to question: How vulnerable are we? 

I found Adafruit developed an ATmega32u4 adding a couple of extra security features which is good news for our project. I was able to get their eagle file and redesign the board without all the pins I won't use. As a reminder we just want the ISP and USB interface to program and connect to the computer respectively. 

Adafruit ATmega32u4 breakout board.

Adafruit ATmega32u4 breakout board.

Solder Jumpers

Screen Shot 2018-03-22 at 11.31.14 AM.png

There are two solder joints on the breakout board from Adafruit. According to  its documentation, they are:

VCC solder jumper
The board is powered by the USB port at 5V. There is a 500mA polyfuse to protect your computer from a shorted circuit. If you'd like to run the board off of another voltage, you can do that by cutting the VCC solder jumper bridge underneath and connecting an external voltage to pin #2 of the ISP header. Note that running the board at 3.3v @16mhz is considered overclocking. We do it for prototypes and it seems to work fine but it's out of spec!

HWB solder jumper
If you ever want to disable the bootloader you can cut the bottom 'HWB' jumper trace. This will disconnect the 'hardware bootloader' pin, you can then use the button as a plain reset button. For the first few runs of this board we set the fuses to still use the bootloader even with the HWB jumper cut, if you want to get rid of the bootloader, please set the fuses to remove the BOOTRST fuse. Sorry!

This is important being that our board does not have a bootloader and we will be connecting this guy via USB and ISP 

PROTOTYPING:
BOM:

1 - LP2985-33DBVR
1 - USB 2.0 SOCKET/male
2 - 18pF capacitors
2 - 22R RN3D/2 Resistors
1 - 16MHz KX-7/1 Crystal
1 - ATmega32u4
1 - RN1D 10K/1 Resistor
1 - CAPACITOR 0.1u/4
1 - CAPACITOR 10u/1

All the parts are available at Digikey.com
Fortunately, I had just to buy the Atmega microcontroller. I bought 2 just in case.
https://www.digikey.com/product-detail/en/microchip-technology/ATMEGA32U4-AUR/ATMEGA32U4-AURCT-ND/3440960

DESIGN

I decided to design one-sided board in order to check all the connections just in one look. I was using 14 components which can be arranged without air cables. If I want to make the board smaller I can try to make it double - sided but as long as I decided to acid etching this will make it more complicated.

I decided to get off the solder jumpers (connecting them completely) which will represent a problem in the future, as long as the HWB jumper allows to power up the board via ISP.

FABRICATION:


I did acid etching in order to subtract the copper that I wasn't interested in using. Fortunately, all my connections were working without any short cut.

My only issue was that the rubbering acid didn't work for me (It took too long and I had to manipulate the board a lot). I used acetone instead which is stronger

Once I checked this I printed a stencil to put all the solder paste in just one go because I tremble a lot. This work just fine as well. Once I put my parts I used the oven to heat the solder up. The temperature reached 340 degrees Celsius.

I decided to check my connections again and I found several issues:

  1. Some paths were broken. I suppose I manipulated too much the board with the rubber alcohol. Next time acetone as first try.
  2. The crystal 16MHZ is huge and is touching another path which is not supposed to. Getting this crystal out I take off the copper as well so I had to repair manually with some paste and wire. I had to use the microscope because the path is way too thin. I changed the crystal to a smaller one.
  3. All the routes were too thin and easy to break in general.

BURN THE BOOTLOADER

Being that the ATmega32u4 is new, it does not have a bootloader. We have to put it via ISP with the Arduino as Programmer. So we prepare the next set up:

This schematic represents the Arduino connected as programmer to a 6 pin header.

This schematic represents the Arduino connected as programmer to a 6 pin header.

Current status


USB host - Homemade hardware

Have you ever receive a free USB? or maybe pick one up from the street?

CAREFUL. This devices will have access to your hardware with your authorization, sending and receiving data and if you are careless, It might be more data than you intended.

My device will take advantage of its size to camouflage as USB device and work as tool to make people aware of their vulnerabilities. Think it twice you receive an USB from me.

I will use the Keyboard.h library for Arduino. This library allows us to send data from an Arduino to our computer in order to simulate keyboard's keys or even mouse actions. This library just works fine with Leonardo, Esplora, Zero, Due and MKR Family, due to the microcontroller in these boards supports USB host i/o.

https://www.arduino.cc/reference/en/language/functions/usb/keyboard/

The board is the ATMEGA32U4

https://www.digikey.com/product-detail/en/microchip-technology/ATMEGA32U4-AUR/ATMEGA32U4-AURCT-ND/3440960

We ordered two just in case.
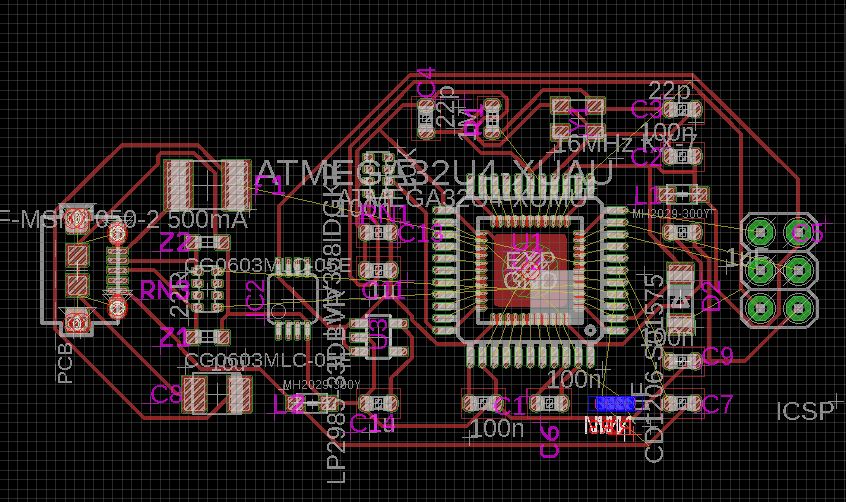
Getting the Eagle file from the Arduino Leonardo. We got off all the unnecessary hardware (more of it security measures and I/O pins I won't use). We got this board:


arduino.JPG

And this schematic:


schematic.JPG

This Microcontroller has (ATMEGA32U4) 44 pins and make a boards in its current state will demand a double-sided copper board which I wont use. The idea is to keep it as simple as possible. So, in the next iteration we will get off of more parts.

What I notice is that Leonardo board does not have a second microcontroller to convert USB to Serial which are good news, meaning that in some way we can connect the USB socket directly to the microcontroller without any middleware. I will keep the 6 headers ISCP to program the ATMEGA32U4 in the future.

So far the list of parts are:

LP2985-33DBVR/1
USB 2.0 SOCKET/1
CG0603MLC-05E/2
22R RN3D/1
22R RN3A/1
MF-MSMFMF050-2 500mA/1
16MHz KX-7/1
CD1206-S01575/1
RN1D 10K/1
CAPACITOR 100n/4
CAPACITOR 1u/4
CAPACITOR 10u/1

Let's hope to make it smaller.

Kinetic Energy - How to induct electricity from human movement?

The goal of this experiment was to generate light via human movement and I will describe the steps that we took to reach this goal.

Apparently, I skipped the physics class in which professor explained how the interaction between a magnet and a coil can induct electricity promoting the movement of electrons. This two elements (magnet and coil) can be found in any DC or Stepper Motor because that's the way they work. In a motor you are using electricity to create a magnetic field which guide the movement, converting electric energy in mechanical energy. A motor is a converter and fortunately for our purpose it can be use in all the way around to convert mechanical energy in electric energy.

This is my first experiment with induction and I encourage anyone who haven tried to give it a chance because it feels pretty magical to induct electricity (even a little amount), being something that we take for granted every time we push switches from our homes. What about if they just stop turning off someday?.

We decide to choose a movement which allow us to explain how easy its induct electricity (the difficult part its to maintain it), so we choose the act of swinging in a hammock, an easy and almost intuitive pattern you follow being in a hammock. We noticed that we're facing two problems:
1. Need to convert arc movement to circular mechanic.
2. Insufficient RPM or Swinging frequency (pendular movement its too slow).

The swinging of the hammock implies an arc which has X and Y components. This can describe a circle allowing us to attach the hammock to an unfixed point of our gear to allow rotation 

The motors come with many features including torque, RPM, relation, gearboxes and more. This caracteristics describe what you can expect from the motor once is connected to electricity. In the same way you can expect that if you apply the same amount of revolutions at the same rate you will get the electricity the motor were designed for. In our case we wanted to use a motor easy to get (you may find it in the trash) which corresponds to an stepper motor of 12 volts. These motor usually come with a high RPM which means it rotates many times quickly with a given power supply, which means we need to rotate it really fast to get some significant voltage and current. In our case we decided to build a gear system to exchange size and weight for a higher RPM. We decided to calculate the teeth needed in the gear system but this has to be too accurate to make it work properly otherwise it will stuck as happened to us, so we decide to go with a belt system. The relation we use was almost 1:6.

The circuit included a rectifier to transform the AC generated by the motor to DC and a couple of 250uf capacitors to retain electricity and normalize peaks.

Once in experimentation, our motor was generating 9V and 150 mAmps. We built a base to entire system in order to fixed to the floor (being pushed and pulled by the weight of the person in the hammock all the time). The movement of the hammock transmit Kinect energy and our gear systems amplifies the speed, but unfortunately the points in which the hammock is at its highest altitude the speed goes to 0 (as in any pendular movement) given us a gap between induction, so our light was fading in and out. After we change the light for a LED strip, the strip was flickering so we decided to remove the capacitors to use the peaks of current because we were having gaps anyway.

In this experiment we are wasting so much energy (with the mechanics, circuit, etc) but we are still able to induct electricity from it which make us ask ourselves how many other daily actions can be turned into usable energy in a so much more efficient way. We gain a better understanding of kinetic and electric energy and how it is easy to induct an transform but how difficult is to make it durable and wasteless.

This project was produced by Daniel Castano, Sam Chasan and Roland Arnoldt 

WEMO Web control

Badly documented. That's the most of the part I can say. Belkin asks you for emailing them if you want to get some documentation.

We connected to the WEMO with a WEB based interface. The only thing we can do is turn on and off anything connected to the WEMO plug. For these requirements, we just need a sad toggle button. This was the workflow:

-Connect WEMO and WEMO app to know the hardware and sw (You need to connect both devices to the same network)
-Connect the  WEMO to a network I admin to look for it, knowing its MAC and range of IP
-Create a node js client to request status and send instructions to the WEMO. Server

Two things were vital in this prototype were Tom Igoe's code for Arduino and Wemo-client library for node.js.

THOUGHTS ON THIS.

-They communicate via UPnP
-Client should send POST request
-The client should check current status periodically, being that sometimes the data is inconsistent (e.i It is on and it answers it is off or backwards).
-The client and server exchange a whole XML


PCB Design.

With the help of our new homemade shield for programming the ATTiny85, we will design a board to host the previous sketch (a little catch up simple analogue input controlling an analogue output).


shield.jpeg

The tool used is EAGLE: a software to design circuits and was bought by Autodesk few time ago with many new features according to Andy Sigler, so let's believe in him and these new features. As you can imagine, The software comes with two views to understand the schematic and the real world which I found pretty intuitive. You can appreciate those below:


Homemade01-01.JPG
Homemade01.JPG

These two images represent the same circuit:

-ATTiny85
-LED
-Capacitor to decoupling
-Press sensor represented by another resistor
-Resistor to pull down the force sensor
-Resistor for the LED
-Header to provide power

As you can see all the pieces were arranged in a board of 5 * 3 cm approximately with holes of 1 mm to be reached with a bit mill of the same size. The circuit is almost ready to be printed.


ATTiny85

This is a first experiment burning an Arduino sketch into an ATTiny85 microcontroller. This time we will have an analog input which will control an analog output.

Step by step you should:

  1. Upload Arduino as ISP sketch into your Arduino UNO or similar
  2. Connect everything
  3. "Burn Arduino"
    1. Fuses are set
    2. flash ArduinoBootloader
    3. Select programmer "Arduino as ISP"
    4. Upload using programmer
  4. Upload your sketch using programmer.

According with the ATTiny85's pinout schematic


download.png

We have 5 digital pins (blue ones) and 3 analog pin (red ones) which is enough for our little example. Let put a force resistor (analog input 0 - 1023) in order to control a fading LED (which receives 0 - 255).


WhatsApp Image 2018-02-01 at 9.18.17 AM.jpeg
//ARDUINO CODE
int led = 1;           // the PWM pin the LED is attached to
int forceR = A1;        // Pin 2 = A1 according to pinout
int force;
// the setup routine runs once when you press reset:
void setup() {
  // declare pin 9 to be an output:
  pinMode(led, OUTPUT);
}

// the loop routine runs over and over again forever:
void loop() {
  force = analogRead(forceR);
  brightness = map(force, 0, 1023, 0, 255);
  // LED gets brighter the harder you press
  analogWrite(led, brightness);

}

MoonLander interface

In this exercise we created an interface control to play this difficult game.
http://moonlander.seb.ly/

INITIAL THOUGHTS

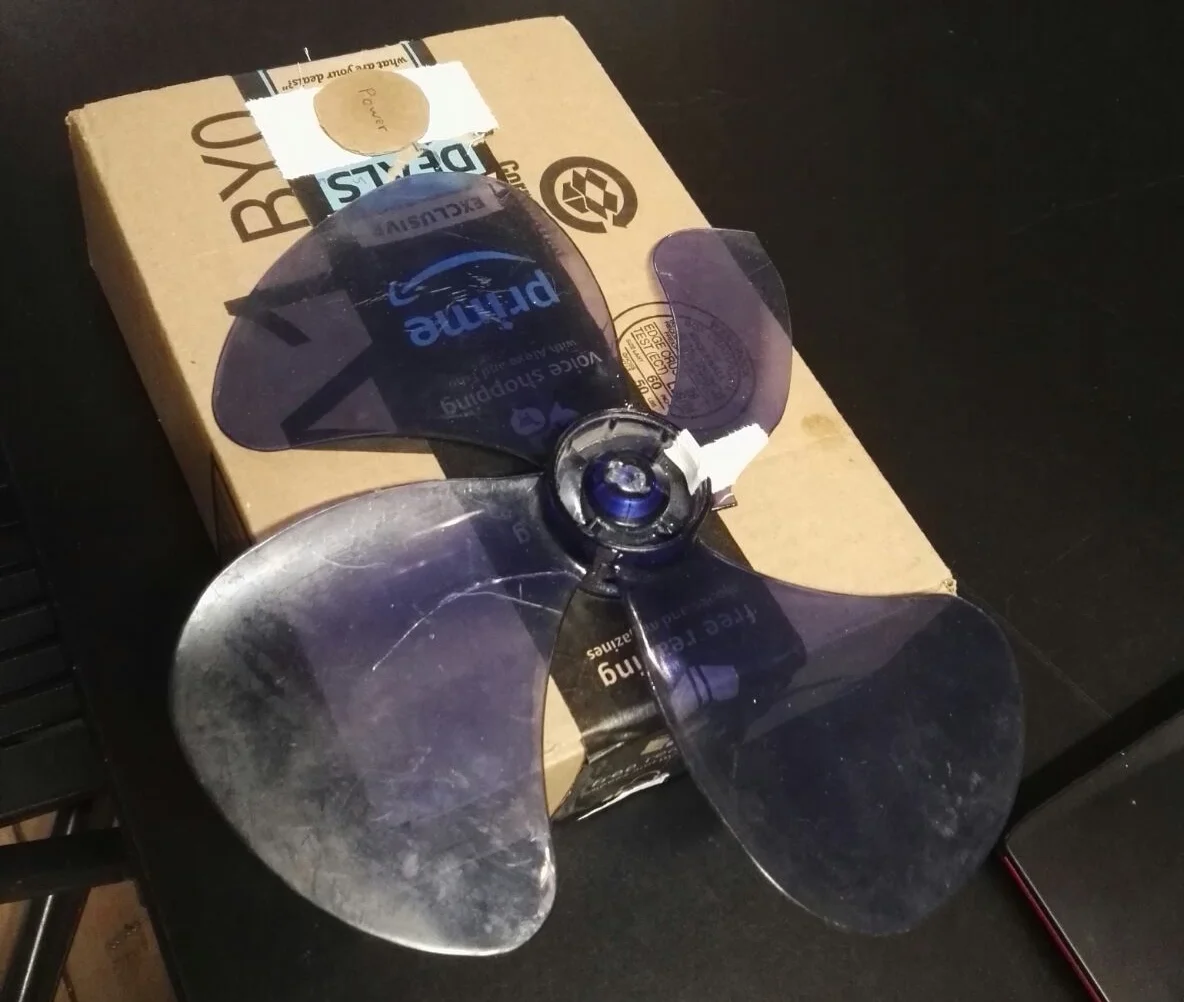
1. Power without a feedback to press it more.
2. So make the power button bigger and more sensible
3. Potentiometer with a stop in the middle to handle left and right
4. Have a sensor to control the angle of the ship


moonlander.jpeg

ISSUES
1. With the big knob, the user doesn't feel the stop point in the middle
2. This input doesn't have memory, then putting the sensor in the default mode is an extra step for the users
3. We don't have way to know the ship's orientation because is relative and the sensor was thought to control absolute position
4. An encoder would be a better option
5. The power button is not sensible enough. I should use a capacitve sensor to sense contact. 

MANY WRONGS