Gen1 Runway Experiments

Gave a try to the video-to-video AI tool available in Runway.
This tool can take a picture or prompt to change the aesthetic of the initial video.
I took a short film I made many years ago for my design bachelor. This video piece was created with 3D software (3ds Max and After Effects), and it was purposely done with a minimalistic look and feel (simple colors, no reflections, no refractions, no textures, and low lighting ray bounces) because We didn’t want to spend a lot of time in the rendering process. Ultimately, it took around two weeks to render the whole thing.

Now that we have these type of AI tools available to us, I wanted to check how much quick post-processing can be added without investing a ton of time into re-rendering each shot.
We gave it a try with try different prompts:

  1. Make all the textures metallic with a purple tint

  2. Make this video as if it was drawn with a pencil. Only maximum 3 gray colors, and include black.

  3. Make all the materials as if they were clay

  4. Make the aesthetic like if it was made of clay

Results were delivered extremely fast (if you compare it with the number of minutes that this could have taken me with the old method = post-processing in After Effects) at around 1 minute.

You can totally distinguish each video aesthetic. Of course, there are some artifacts around them, but it is still an impressive result given the time spend in these little experiments.

Something that comes to my mind is: How to keep the aesthetic of the characters across shots.
In theory, adding a description of the composition and a physical description of the character should help the model represent the characters across the shots consistently; however, it also makes me want to play with a character that changes throughout the film


Input

Output

LED Lamp

My brother’s birthday was coming and I wanted to give him a present. I remembered how he mentioned that he always had wanted to learn how to weld. There is actually a funny story when he was a kid and told my dad that we wanted to learn how to weld and create big sculptures. The next day my dad gave him a soldering iron and wire, saying: “Go boy“. We are still not sure of my dad’s intentions, but it was definitely not what my brother desired, and he made it pretty obvious with his face, he still does it.

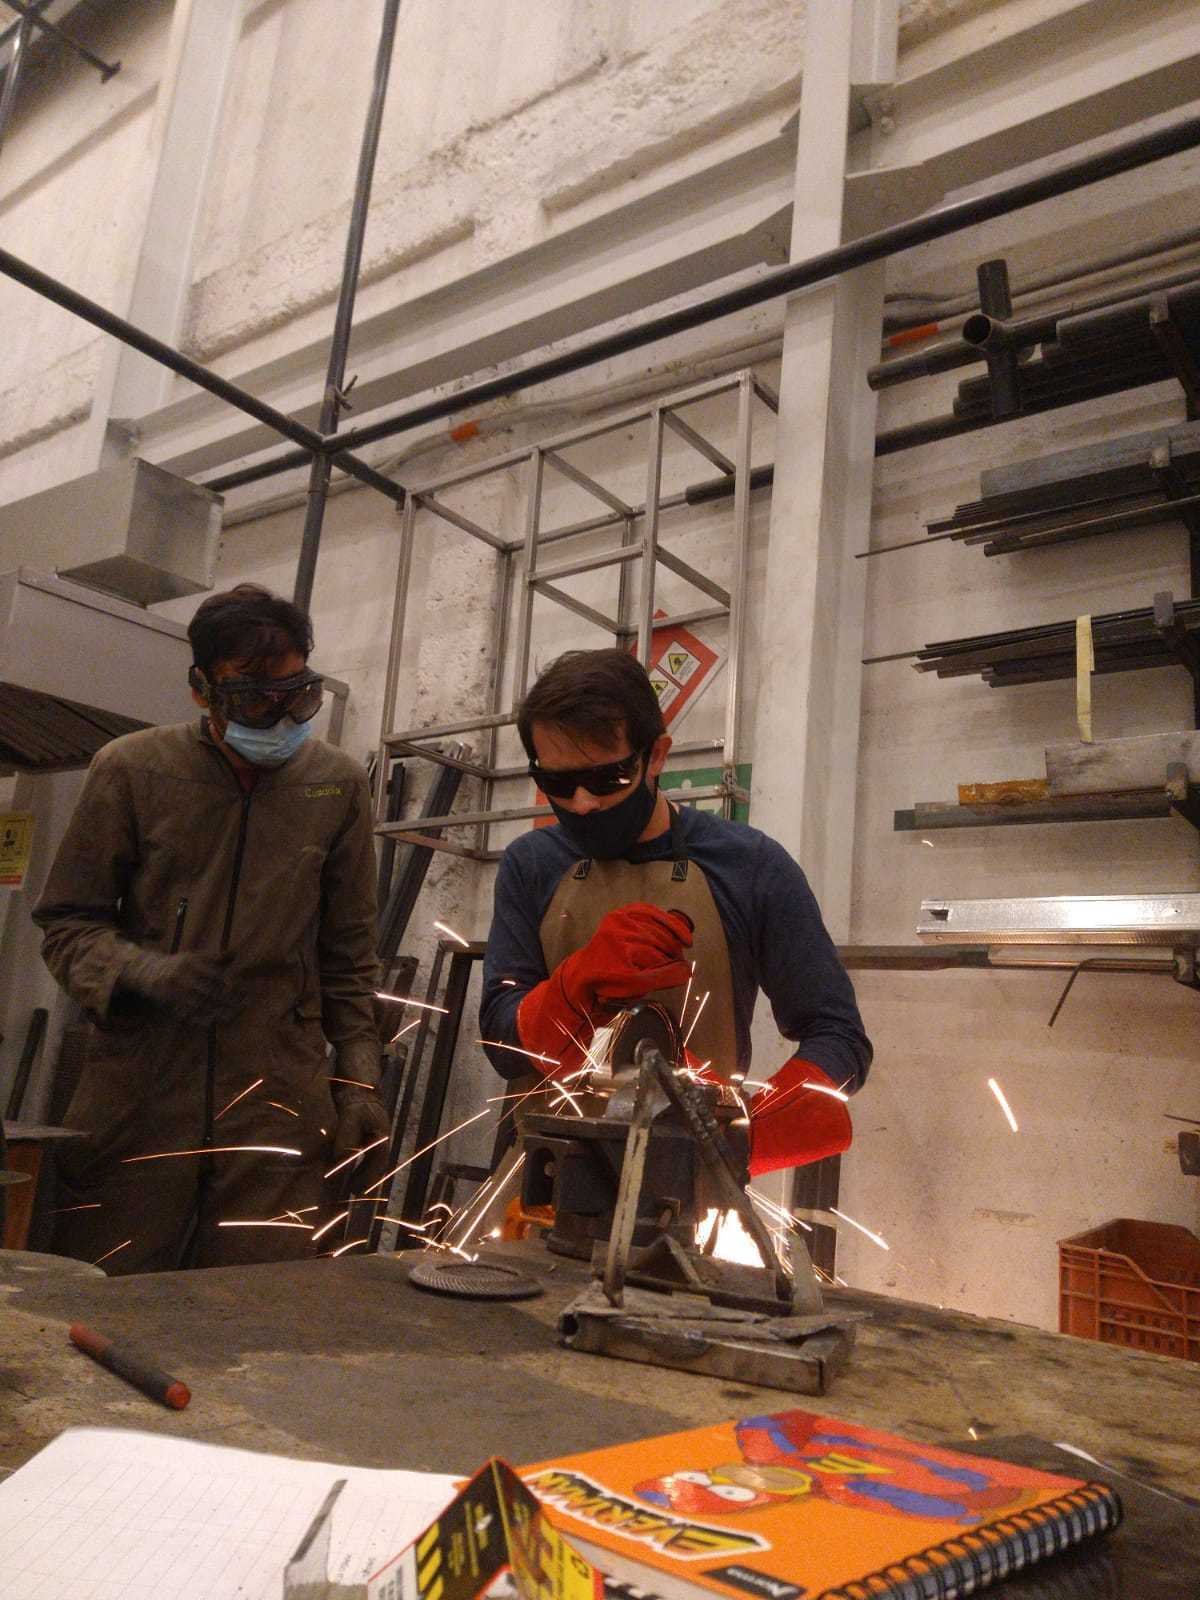
Anyway, I looked for some welding courses in Bogota, and I found a good 2X1 discount that ended up dragging me with him to this beautiful maker space in the city. Totally worth it, we worked on projects we liked and we share a good time, brainstorming, selecting materials, learning, failing, and welding.

Off course, I didn’t know what I wanted to make, but I was excited about working with such durable material, steal. I have worked making many interactive installations for museums, and branding activations. Most of these pieces have been made out of wood because of the ephemeral connotation of the project. Projects that live for 2 weekends up to 2 years, meaning, not permanent. Then I thought it was the perfect opportunity to create an installation that can live forever, being useful at the same time. I ended up choosing to make a Lamp.

First class we got an introduction to the tools and the material. It was refreshing to hear how the professor thinks metal is way much easier to work with than wood. According to him, you need fewer tools, it is more durable, and you can prototype much faster.

My brother decided to build a pull-up bar. I won’t share his process because I didn’t document it! Also, it is not an interactive piece.

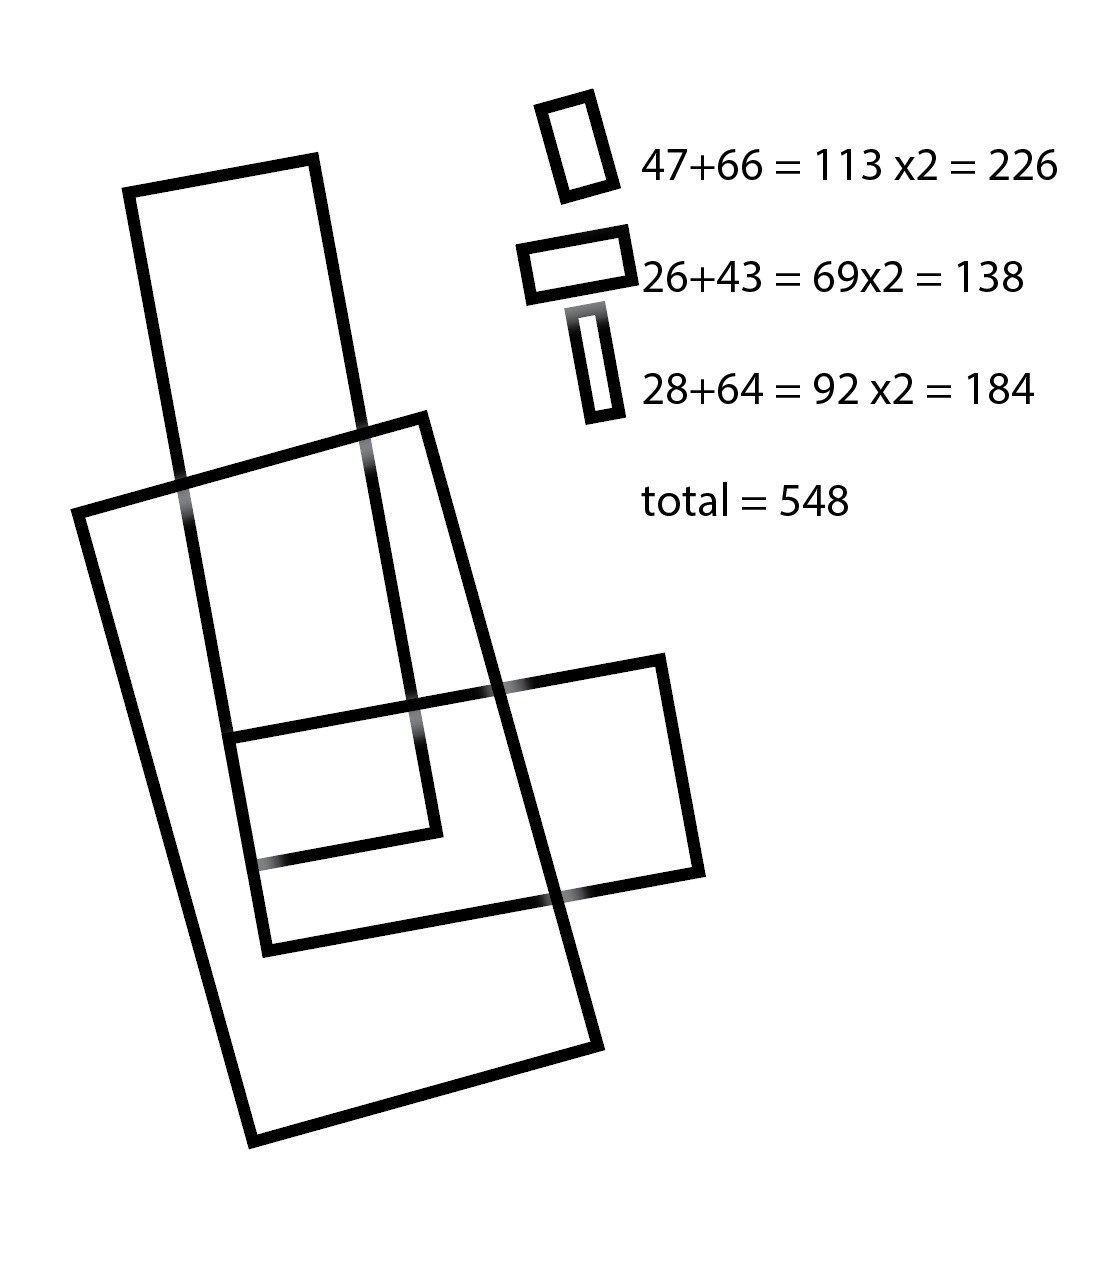
Steal comes in 5 meters bars. I planned to have my project under that parameter to save some money. So I got the required material. This was the sketch I got in cm. I shrink the last rectangles to get less than 500 cm and then have enough material, but It didn’t get reflected in the image.

Once I got that I started cutting, all the pieces that I needed. This is a time consuming process, especially because I was noobie So this part took a couple of sessions. This was the result after a couple of weeks.

Off course, I wanted to test the light before everything got welded. LED strips also come 5 meters long so it was a perfect match, and since I was using the internal side of each rectangle to place the light, I was supposed to use less than 5m in LED strip

Initials lighting tests were successful and that was great to start welding and painting!

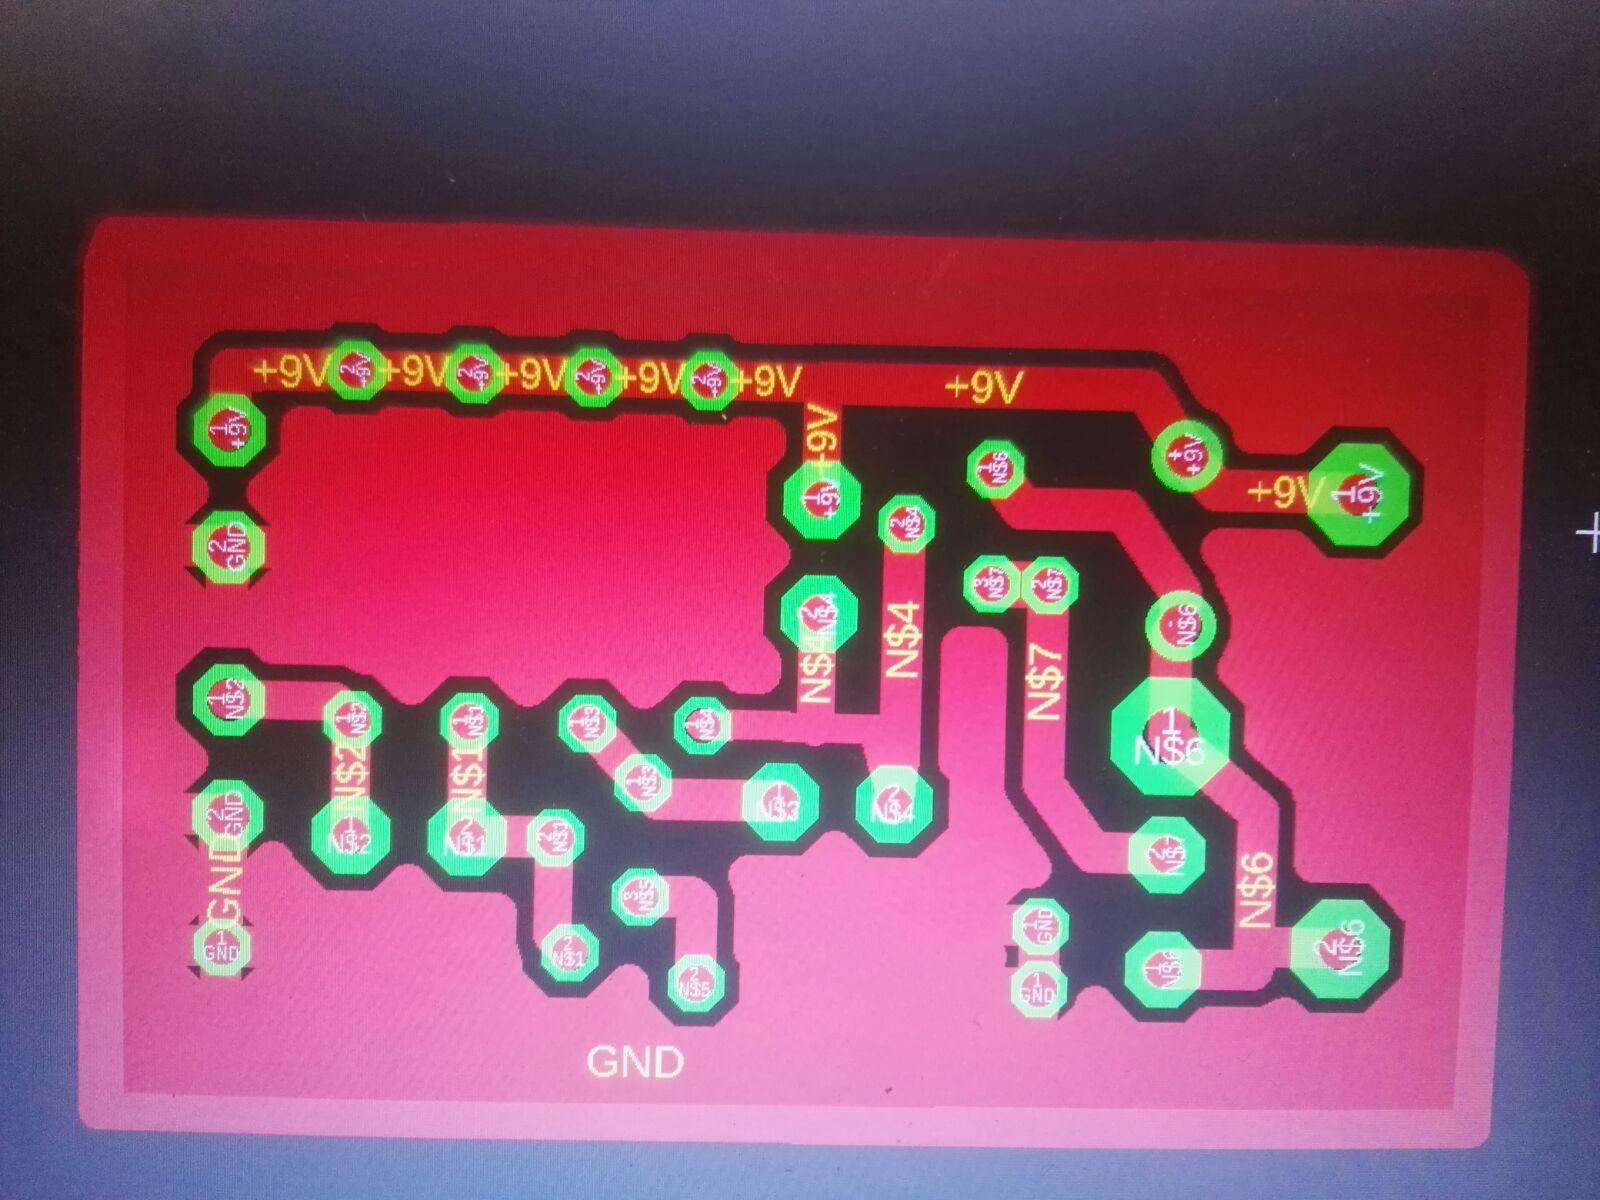
I decided to go with NodeMCU in order to have WIFI capabilities. Easy to use and pretty much the same as an Arduino. I also figured that a power supply of 5v and 2A was enough to light up the entire 5 meter LED strip at least at 20% the power which it was enough brightness. Also a pretty regular power supply, easy to get. Lightning tests also included diffuser material tests just to get the right brightness and light distribution.

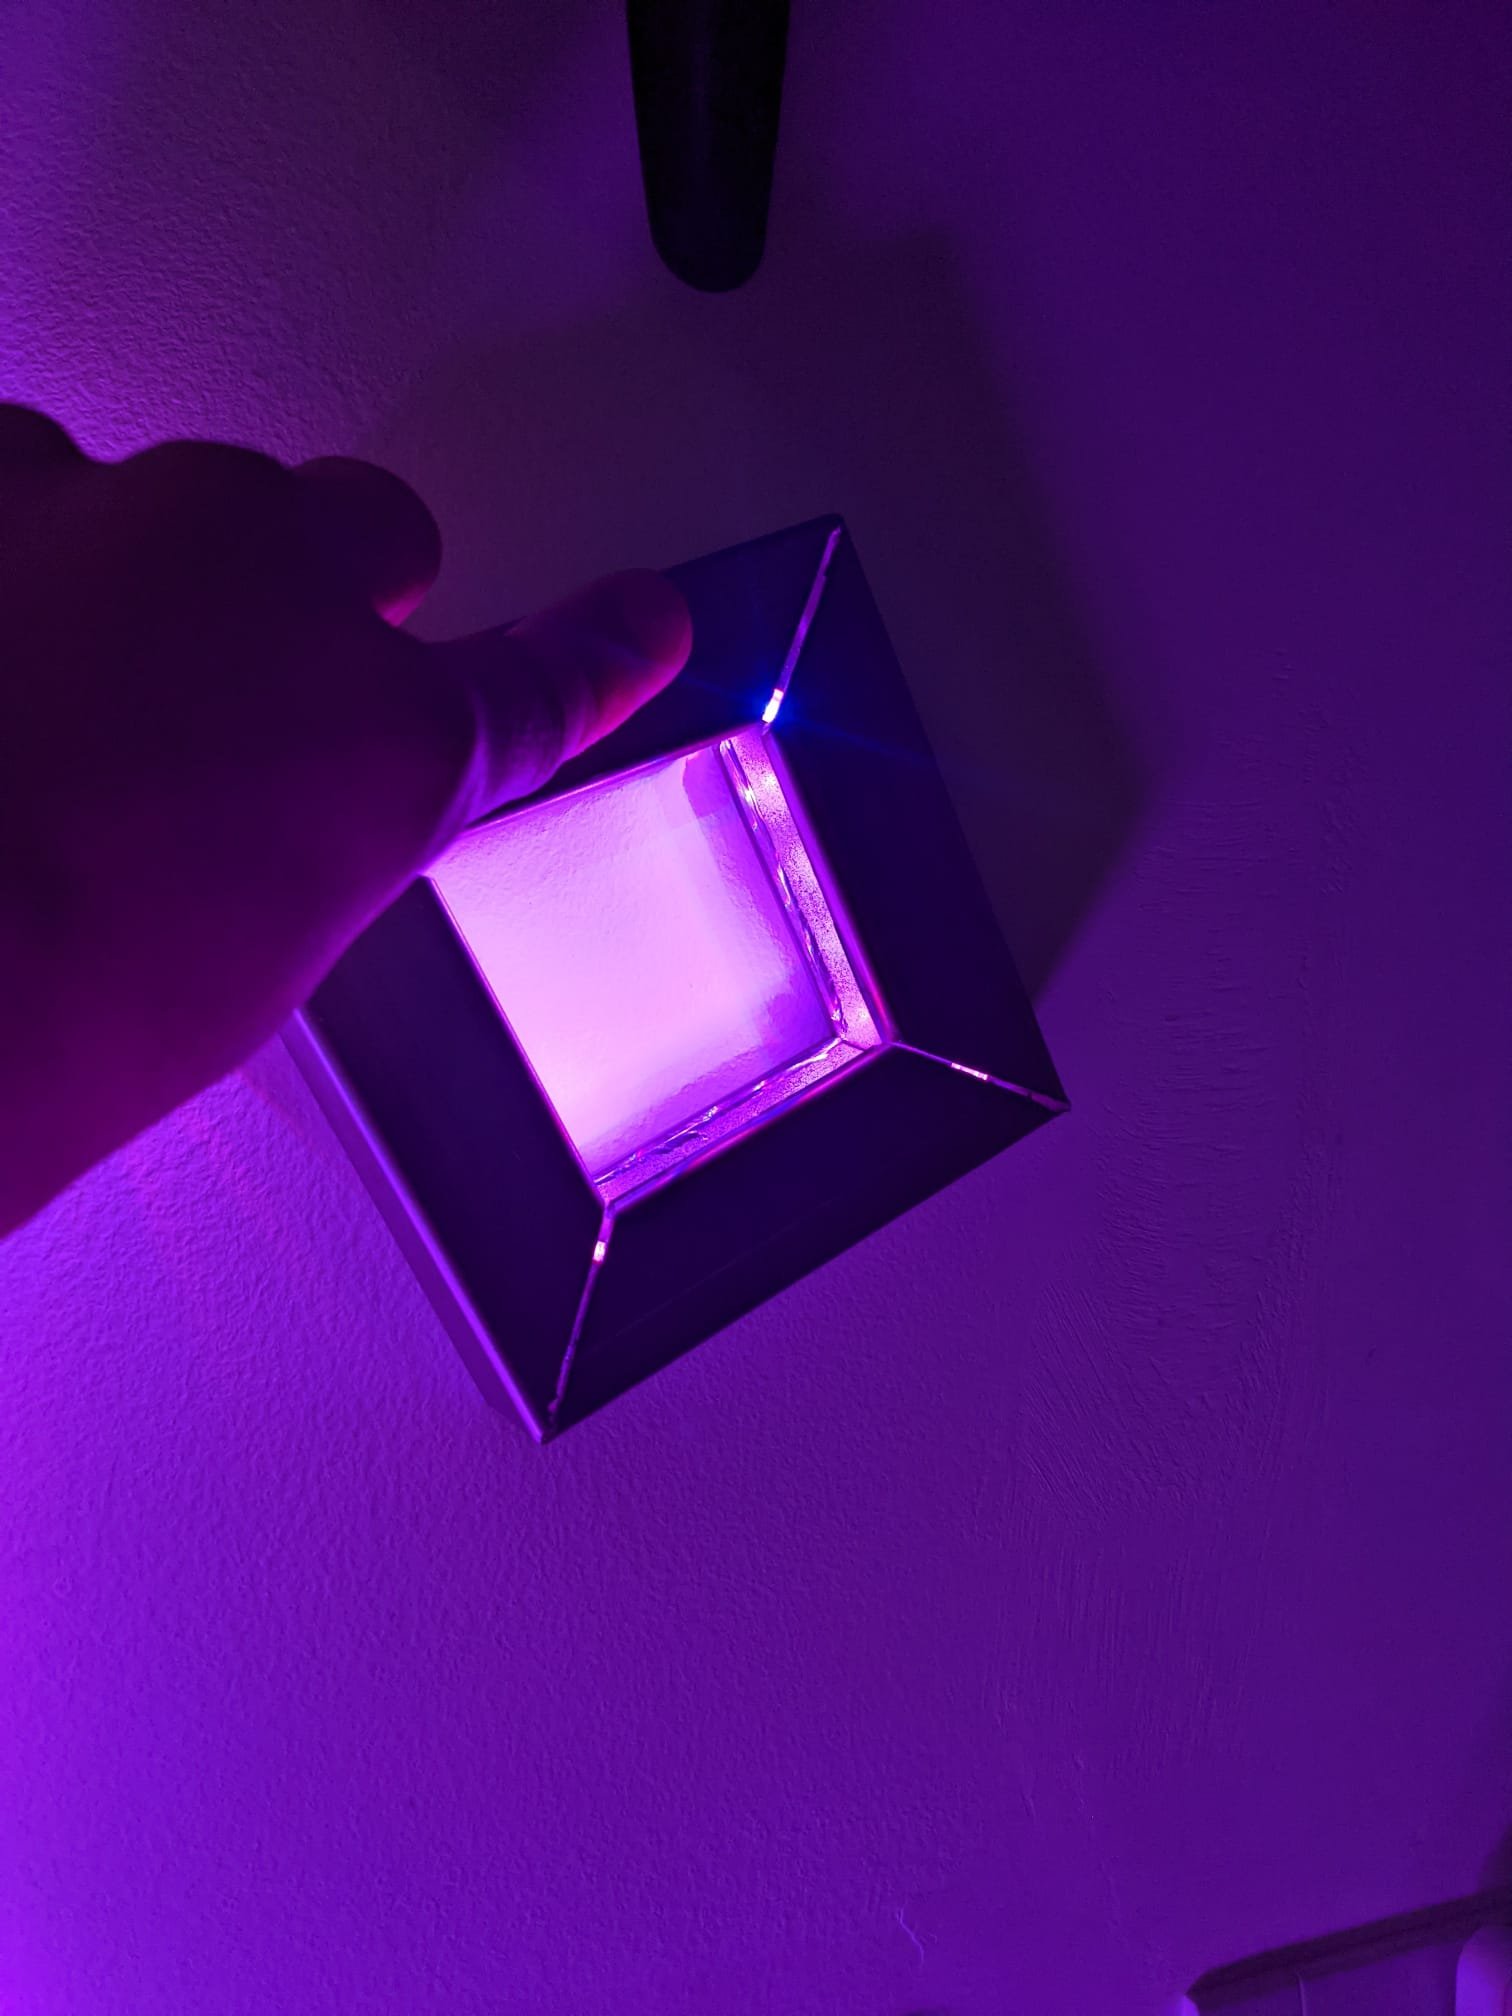
Final results are.

Lumbalú

Es un ritual funerario para los más de 700 líderes sociales que han muerto en Colombia desde 2016 hasta la actualidad. El lumbalú es una tradición palenquera de origen africano que rinde homenaje a el difunto durante nueve días. Esta interpretación interactiva rinde homenaje a todos estos líderes sociales mediante la visibilización de su trabajo y obra.


Ha medida que los visitantes interactúen con los instrumentos de percusión, el espacio mostrará imágenes audio-reactivas que responderá al ritmo, volumen, y duración de los sonidos producidos por los tambores. Una base de datos que guarda imágenes, nombres, y departamentos relacionados a la vida de los lideres asesinados, escogerá al azar un líder y por medio de una video proyección inmersiva, se revelará su obra y lucha.


Este proyecto busca recordar las voces de algunos valientes que fueron callados y evidenciar la problemática social en Colombia.

07.png

IBM Watson Chatbot

IBM Watson offers several services that are under the artificial intelligence umbrella using their infrastructure to run models that you can consume through their API. Unfortunately, if you want to use more than one service you should implement the integration between services by your self.

In my case, I was interested in developing a voice-enabled chatbot. An integration that makes the interaction between human and bot faster once the human doesn’t have to type, promoting a more natural interaction by using just your voice. The expected experience is similar to the one users have with platforms such as Google Home or Alexa, however, in this case , the assistant/bot is controlled by us, serving whatever service or guidance we program on it.

This particular bot will help you to set a appointment. For this purpose we should consume three different services.

  1. Speech To Text: It will transform the user’s voice into writing text

  2. Chatbot / Assistant: It will provide answers or responses base on the context and requirements from the user

  3. Text To Speech: It will transform text provided by the chatbot into a voice. This voice can be changed since it is generated my AI algorithms.

This is the final result.

We can change multiple features of this implementation. We can provide different services and conversations based on location, time, day, user, and most important in my opinion, context. Context allows you to have a more natural conversation where the chat-bot keeps track of variables that are critical for the service that is being provided. For example, the chat-bot keeps track of the name of the user, his/her preferences, and if the user had mentioned specific requirements, the bot can bring them back as a reminder to complete a final request.

Image Classification using MobileNet

Using MobileNet a light Javascript machine learning library for image classification I was able to classify the live video feed from the web cam in real-time. The script will look for an image in Flicker that matches the description. We are able to see some hats, mugs, cups and color that were displayed to the camera.

Live Kinect and Shaders

Based on Keijiro’s point cloud visualizer I was able to re use his code in order to visualize the live raw point cloud generated by the Kinect V2. Once the shaders is displaying a little disc for each pixel (with its respective position and color), we can play around with them, and generate some transition based on vector operations.

Visual drums

The origin of this project was the idea of give the user or users the ability to control the projection mapping over the building. This setup allowed us to have 4 buttons that triggered different visuals on the canvas and promote the interaction on one person and 4 drums or 4 people with one drums each.

An Arduino nano along a microphone module was installed inside each drum. The microphone sensed the audio peaks on the environment and the Arduino translates into keyboard commands. That way we can connect the hardware to any computer and It will detect the peaks as key presses. We use a simple project on Resolume Arena (a VJ software) to demonstrate the responsiveness and capabilities of the installation.

Enlighten 02

Hardware

First testes shows there are glitches in the lower voltages, so knowing that working between 10% and 30% of the power is working fine (50% is too brigth to enjoy the experience but you can go up to 90% easily if you want to). So far there are not significant differences between LED and Tradional bulbs so in the first testes i am mixing them without bigger issues.

8channel.jpeg

Regarding the flame’s movements tracking, it could be accomplished by using image analisys and video input but it would include camera setup and callibration according with light from the environment (this is necessary in almost all scenarios I can imaging). The addional problems with the camera includes shadows casting, color callibration, resolution, tele lenses, point of view, blind spots, etc. I decide to use 4 light sensor in the NORTH, SOUTH, WEST, EAST locations related with the candle. Every photoresistor will give us analog values from 0 - 1023 of how much light is receiving each corner (almost like x and y factors).

In our ideal scenario the flame is giving the same light to every sensor, but if there is more light in one sensor than another it means the flame has a direction. This baheviour allow us to make this relation:

+X position = EAST - WEST; +Y position = NORTH - SOUTH;

This resulted values are the direction vectors of the flame related with a coordinate system at [0,0]; For example, is all the NORTH, SOUTH, WEST, EAST are 1023 that means X and Y = 0 which means no direction, because all the sensors are reading the same quantity of light. The cool of this is the noise implied in a flame’s movement which moves the readings every time. The first set Up included uncovered sensors but they didnt work because they were receiving external data from environment light. Convered sensors focus on sensing our flame.

photoresistors.jpeg

The first prototype was made in cardboard which is not the more friendly material with fire. So far I haven’t had any sort of issue with it, but it is crucial to change the materials to avoid incidents.

Simulation

Enlighten will controlled the brighness of 8 bulbs in the space depending on where they are, meaning, their relation with the flame. In order to make this happen I designed a 3D simulator where the bulbs can be placed whereever its necessary. This app make the experience editable and scalable (this may include new features in the future). The simulator include a particle system which simulates a virtual flame which responses to virtual wind. Brightness and wind’s direction is controlled by our SERIAL readings from ARDUINO and going back to dim every bulb.

simulator.jpeg

Testing

The first testes included linear arrays of light bulbs (8 of them using just one 8 channel module).

There was a flickering in some of the bulbs due to the frequency of the voltage. In despite 8 channels dimmer mentioned it identifies frecuency and voltage automaticly, you have to be sure you’re using the correct timing setup in your Arduino’s code in order to work with 50Hz or 60Hz (The exact timing data is included in the Arduino’s code example).

Deployment

In order to control 16 bulbs is necessary to use at least to Arduinos. This implied 2 Serial ports to write to (at least in the processing side). This also implies that each Arduino should have a differemt baud rate in order to stablish a communication. +myPort1 = new Serial(this, portName1, 9600); +myPort1 = new Serial(this, portName1, 38400); The baud rate should be the same in the Arduinoo’s side respectively. That way you can control more than one Arduino.

installationEnlighten.jpeg

Calibration

The light sensors are receiving bounces of light all the time, so It reads different values between natural (morning, afternoon) or artificial light which makes mandatory a calibration process.

Wanna a Brain?

Brief

Let’s make something for Halloween. We didn’t wanna thought about technology, instead, we decided to think about a Halloween product to share with our audience regardless the tech involved. Personally speaking, I can say this is the first project I’ve made just for fun, thinking what are the feelings we want to produce in people. Now, I feel that’s the right and only way to do it. Just ask to ourselves: What do we want to communicate?.

What to produce?

We wanted to produce Halloween feelings of course!. Thinking about the format, target and place we decided to hide every tech clue about our device, in order to create a freak, repulsive experience where the people would share, laugh and wonder.
For some reason the first thing which came to our minds was food. Mostly interaction in Halloween it’s about get and give some food, sweets, chocolates, etc. Let’s give interactive food. How weird can that sound?. That’s being said, it was sort of easy to picture what we wanted.

References

Head in jars from futurama was the main reference. These floating heads in jars of different personalities. What about the opportunity of taste that water, those faces or eat those brains. The brain shape gave us a character with no identity who can be anyone, different voices and faces.

wannaBrain07.png

Concept

Once the basis were thought, we started deliberating about several parts of our system. We thought about the timeline experience which is: people are gonna approach to this repulsive food being invited to eat it. They would try to eat it and then they would be aware of its “active” state. Let’s think about this device as a system which has inputs, procceses, outputs and maintenance.

Inputs:

1. touch

Processes:

1. Give the brain a voice and a face - Identity
2. Come to live 

Outputs:

1. Speak
2. Move
3. Light up
4. Show a face

Maintenance:

1. We made a cardboard box with access in the bottom face (just in case we need quick access).
2. We realized people might not be interested in eat it because of sanitary issues. 
We came with extra materials as foil and plastic wrap.
3. The food would be the last part to assemble to ensure cleanliness.

Technical solution

We decided to use this schematic.
wannaBrain06.jpeg
1. Capacitive sensor: based on CapSense library for Arduino to trigger action.
2. Button: to trigger actions in case of emergency.
3. 8 Ohms Speaker as sound output
4. Record and playback module ISD1820 to record a message in loop "EAT THE BRAIN"
5. Servo motor to shake the brain
6. 8 lEDS connected to a Shift register.
7. p5.js sketch to trigger images and audios
8. JELLO as a main material. 
It is conductive (metal spoons) to use as a bridge between the circuit and us as a capacitors.

Process:

wannaBrain02.png
wannaBrain03.gif
wannaBrain04.png

We made jello several times because we didnt reach enough density to mantain a firm shape.

wannaBrain05.jpeg

Experience:

wannaBrain.png
wannaBrain01.png

The best is her face!.

Technical issues

  • 8 Ohms speaker’s power is nothing (too low). As a recomendation, It’s useful to have a built-in amplifier module to make it louder.

  • When you touch the jello, you make it shake indeed, so the shake feedback produced by the servo is almost invisible.

  • LEDs have focused light. In order to make it more uniform distribuited you should use a diffuser.

  • Movement of the capatitor, in this case the jello could activate the capacitive sensor, triggering the experience. Your should be sure you have callibrated a right threshold.

White Balance and Exposure exercise

White Balance

Auto White Balance

Auto White Balance

Grey Card White Balance

Grey Card White Balance

This excercise shows the unaccurate color taken by auto white balance feature in the Canon Mark III camera. The auto white balance feature averages the color pixels present in the scene, this produces a predominant color in the image similar to a color filter which alterates the actual color. In order to correct this, we’ve used 50% grey card to set up the white balance correctly. You can find this feature as a Custom white balance correction. This particular photos were taking indoor. The auto white balance give us a yellowish image meanwhile the grey card set up shows us balanced colors.

Exposure

A right exposure is mandatory in order not to lose data. A histogram visualization show us the color distribution in the image, therefore, histogram values goes from 0 (Black) and 255 (White). That said, it is not desirable to use 0 and 255 values and avoid pure whites and blacks. Above images and its histograms show us good exposure examples.

exposure02.JPG
exposure03.JPG
exposure01.JPG

Image Classification

Using ML5 and its image classification model and approach, I implemented this little experiment.

https://trafalmejo.github.io/machine-learning-for-the-web//week1-intro/imageClassification-ml5/Homework/index.html

The sketch is recognizing and labeling images from the live input camera in your laptop. At the same time is sending queries with these labels to an API that responses with URL if multiple images. You can clearly see how the background image change accordingly with the objects you out in front of the camera.

Let’s imagine this feature implemented in a museum where you are able to make your own questions visually. You are looking for a painting with a pose, or a particular object or a particular feature and you are able to request this with images.

VideoMapping in Nairobi

Getting a good projector in Nairobi was challenging. After we came across with a couple of projectors really old and unacceptable shape, we finally found one. This guy was 15000 lumens, fair enough to light up a building given that there is no much public illumination on the street we were working on. Unfortunately

Some of the demos we were able to run was a PACMAN controlled by custom controllers and particles system following your movements.

NairobiMapping.jpg
projector.jpeg

Tracery Experiment

I decided to work with a song that I like:

Kangaroo Court is an umbrella term use to refer when a court or a government member intentionally ignores standard legal procedures of law or justice. That way, the song represent a story where a character go through different states listed below.

  1. Excitement about going to some place the character is not supposed to go

  2. Decision taken

  3. “Too weak to fight” and commit mistakes

  4. It’s captured by the authorities

  5. Accepts his/her little crimes

  6. Character is heavily condemned regardless of his/her defense.

It’s curious to note that the lyrics don’t give further information about the details of the character, places, actions which I read as try to divide the discourse from the narrative. The tool to deliver the discourse is the video in which the artists included more information, and now the main character is a zebra fighting unfairly in a world ruled by lions. Certainly, the character, locations, crimes, authorities can change significantly as the video exemplified, delivering the same concept of injustice and iniquity.

My experiment with tracery can be found here:

https://editor.p5js.org/trafalmejo/sketches/Hklu_tBu7

I tried to assign different characters, actions and location which played around with the same sequence of events. Some of them work and other don’t, and this is happening because I have to pair some objects with possible actions and verbs, decreasing its randomness. Sometimes it is just nonsense.

Feel a Watt!

What about if I tell you, earth consumes 18TW. Energy is a difficult concept to explain and more difficult to visualize. Feel a Watt! will help the users to sense the concept of energy in a better way by using data visualization, analogies and interactive simulators at real scale. The user will understand how a Watt, KiloWatt, MegaWatt or GigaWatt look like.

Instead of using a linear rhythm the user will be tested before keep going with the explanation to ensure understanding and a two-way feedback. I want to take advantage of the VR environment to create impossible objects which belong to a fictional world but explain the real world.

Voice Over: Energy is everywhere: light, nature  cycles, animals metabolism, electricity, heat, food, actions,  everywhere!. That’s why we have a bunch of different unities  in order to measure it. However,  do we have a notion what a Joule or Watt means? What about Kilo, Mega or Giga Watts? Let’s take a tour through these concepts.

Voice Over: Pick up the apple from the floor and put it in the basket. You will move some weight through one meter. This will describe 1 Joule assuming that’s a big 1 kilogram apple.
 

Challenge: User will spend one watt picking something from the space. He/She will pick up an apple from the floor and put in a basket 1 meter from the initial point.

Voice over: WELL DONE!  It doesn’t matter if it took you 10 seconds or 1 hour, Joules describes how much work you did, regardless the time.
Voice over: But what about if we want to have constant energy flow? . Now let’s consume about 5 Joules/seg. Punch the punching bag  5 times in less than 1seg., This is equals to 5 Watts

Challenge: Punch the punching bag 5 times in less than 1 second.

Voice over: Good!. How much energy do you think this guy consumes?
Human beings obtain much of our energy by eating and we spend approximately 100W to live between metabolism and the work we do.
Visualization: another human being doing something.

Voice over: Currently, the electric average consumption of every person is equivalent as if you have 10 personal servants all the time

Visualization:  The human is cloned in 10 version doing the same. This is 1KW = 1000Watts

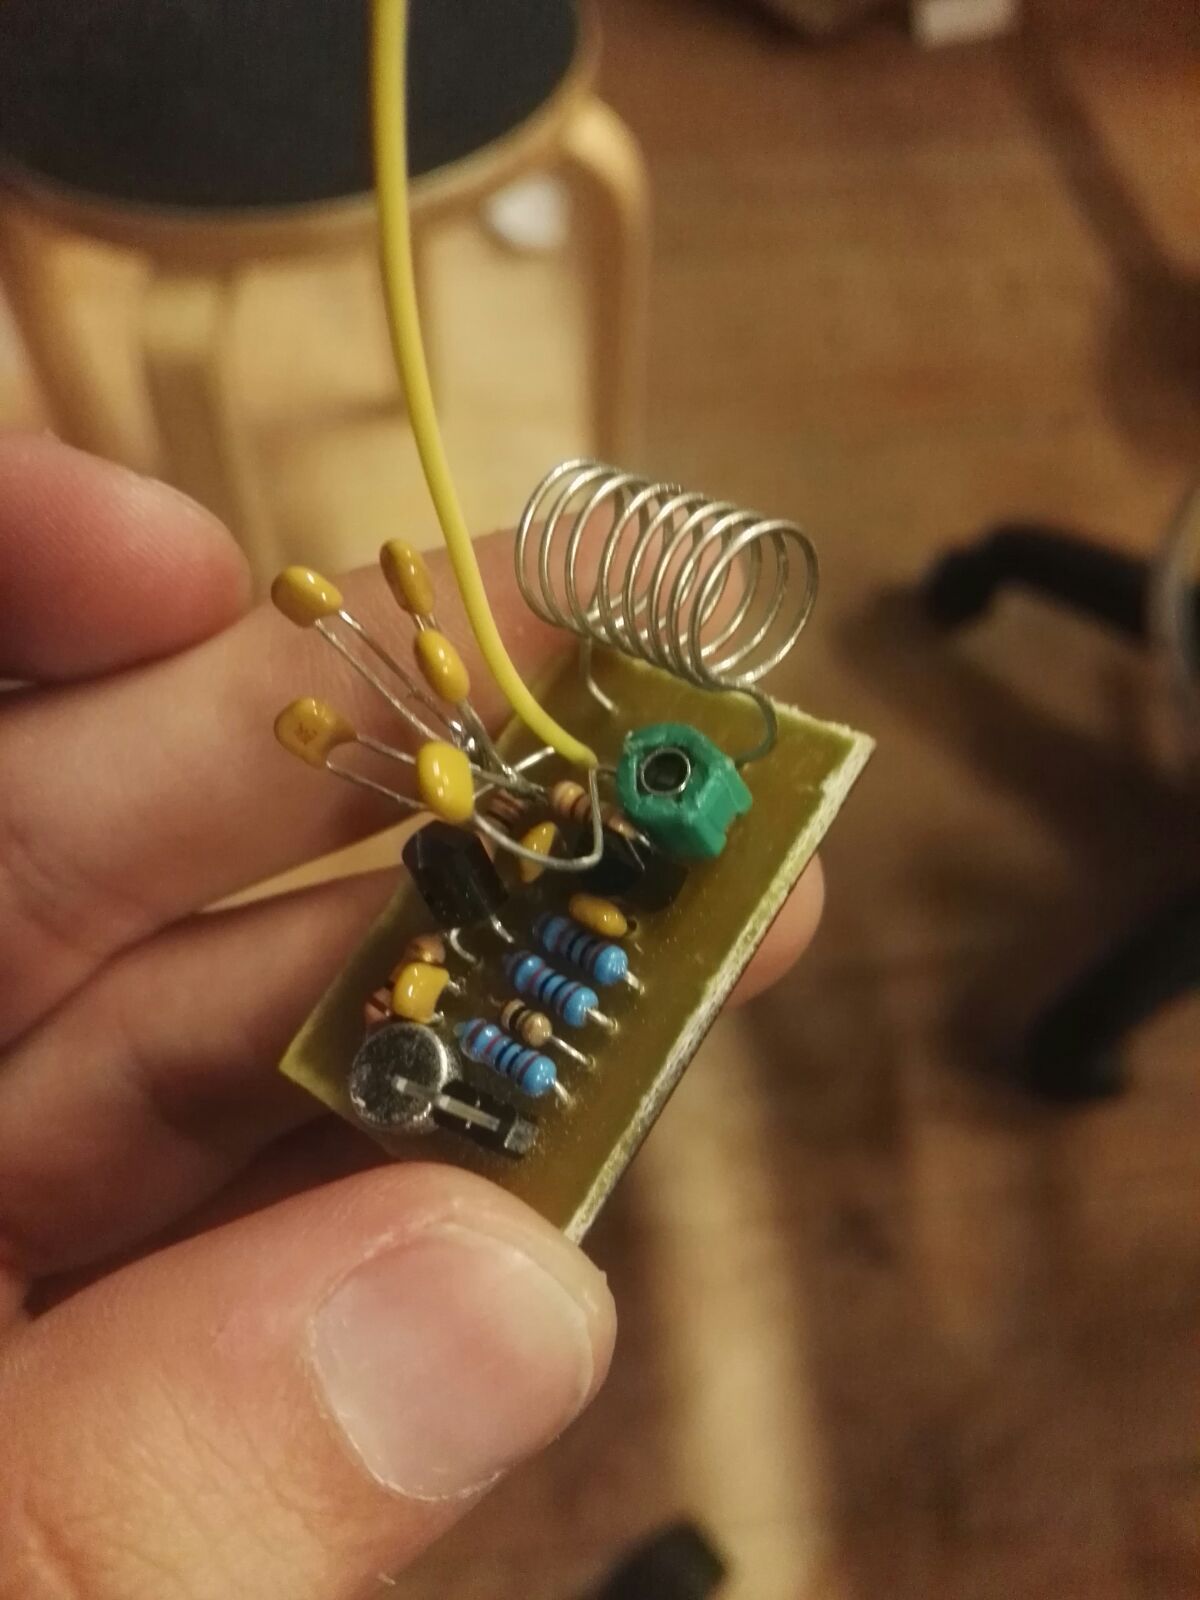
FM Transmitter

Transistors:

+ 2N3904 General NPN Transistor (2x)

______________________________

Capacitors:

+ 15pF or 40pF Trimmer Capacitor

+ 100nF Ceramic Capacitor (2x)

- 10nF Ceramic Capacitor

+ 4pF Ceramic Capacitor

______________________________

Resistors:

+ 1M Ohm ¼w Resistor

+ 100K Ohm ¼w Resistor

+ 10K Ohm ¼w Resistor (3x)

+ 1K Ohm ¼w Resistor